Cloud Asset Inventory
Asset Inventory is a live, searchable catalog of everything you run in the cloud. Once you've connected your accounts, the platform discovers your resources across AWS, Azure, and GCP — every region — and keeps a single, normalized list you can search, filter, and export. It's the foundation that the rest of Cloud Security builds on: posture findings, public-exposure and encryption summaries, and Attack Path Analysis all draw from the same inventory.
What it does
-
Multi-cloud discovery — finds resources across all your connected AWS, Azure, and GCP accounts and regions, using read-only access. No agents to install.
-
Normalized catalog — resources from different providers are mapped into one consistent shape (name, type, account, region, status), so you can browse AWS, Azure, and GCP side by side.
-
Asset categories — every resource is grouped into a functional bucket for easy reporting:
Category Examples across providers Compute EC2, Lambda, ECS/EKS, Compute Engine, Cloud Functions, GKE, Azure VMs, Container Instances Storage S3, EBS/EFS, Cloud Storage, Persistent Disk, Azure Storage Account, Managed Disk Database RDS, DynamoDB, ElastiCache, Cloud SQL, Firestore, Azure SQL, Cosmos DB Network VPC, Security Group, Load Balancer, CloudFront, Virtual Network, Network Security Group Security IAM, KMS, Certificate Manager, Cloud IAM, Key Vault, Azure AD Serverless Lambda, API Gateway, Cloud Functions, Cloud Run, Azure Functions, Logic Apps Containers ECR, Artifact Registry, Azure Container Registry, ECS/EKS/GKE Management CloudFormation, Systems Manager, Deployment Manager, Resource Manager, ARM Templates -
Security at a glance — headline counts for total assets, high-risk assets, public-facing resources, and the percentage of resources that are encrypted.
-
Change tracking — each asset records when it was first discovered and when it was last seen. Re-running discovery updates existing assets in place (no duplicates) and refreshes the "last seen" time, so you can tell what's new and what may have gone away.
-
Export — download the current view as a CSV for spreadsheets, ticketing, or audit evidence.
How to use it
1. Open Asset Inventory
Go to Cloud Security → Asset Inventory in the left navigation. You'll land on the Overview tab.
Inventory is populated from your connected cloud accounts. If you haven't added one yet, start with Connecting Cloud Accounts. Until at least one account is connected, the inventory will be empty.
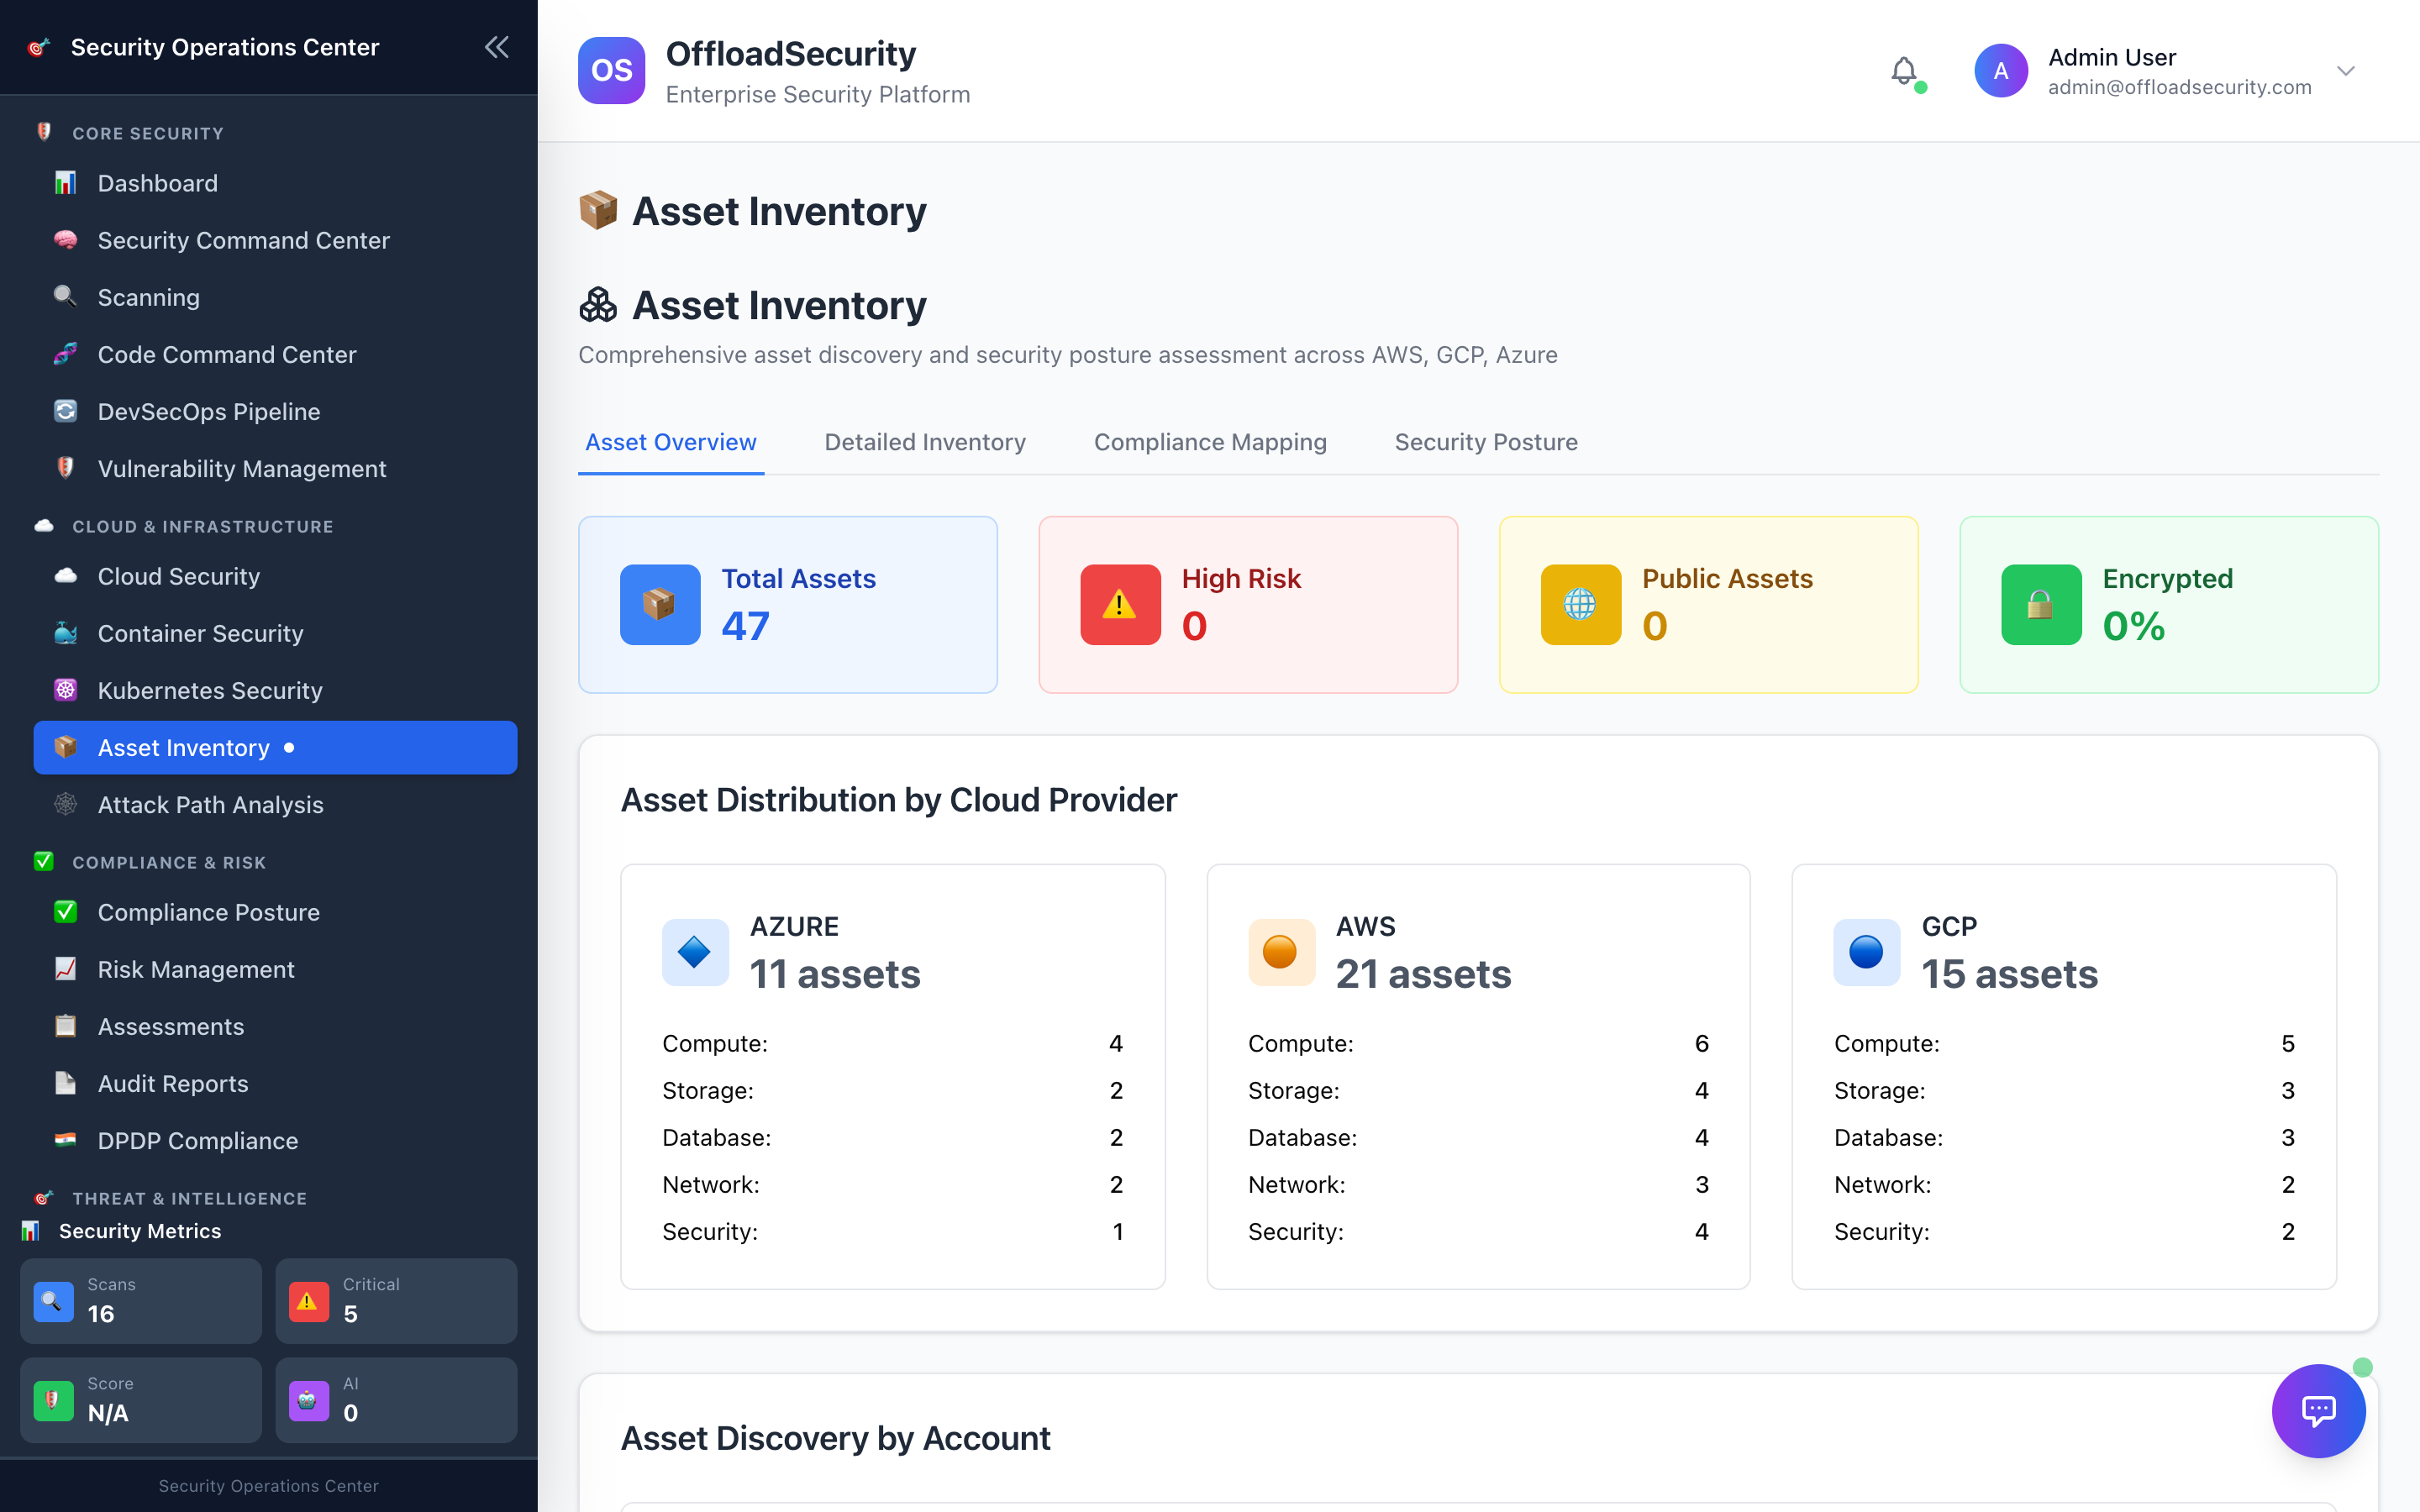
2. Review the Overview
The Overview tab summarizes your whole estate:
- Summary cards — Total Assets, High Risk, Public Assets, and Encrypted (%).
- Asset Distribution by Cloud Provider — per-provider counts broken down by category (compute, storage, database, network, security).
- Asset Discovery by Account — a row per connected account. From here you can View Assets for a single account, or Refresh Assets to re-discover that account's resources.
3. Discover or refresh resources
Discovery runs as a quick cloud scan against the account you choose.
- On the Overview tab, find the account and select Refresh Assets (or View Assets to open it, then refresh).
- The scan kicks off in the background and typically completes in 2–5 minutes.
- When it finishes, the inventory and summary counts update automatically.
Schedule recurring cloud scans so your inventory stays fresh without manual refreshes. See Scan Orchestration for how cloud discovery and posture scans are run and scheduled.
4. Browse and filter the detailed inventory
Switch to the Inventory tab for the full resource list. The table shows Asset (name and native ID), Account, Type, Provider, Region, Status, and Last Seen, and every column is sortable.
Narrow the list with:
- Search — match on name, native ID, type, region, or account.
- Account, Provider (AWS / Azure / GCP), and Status (active, inactive, running, stopped).
- Category (compute, storage, database, network, security, serverless, containers) and Region.
Use Clear All Filters to reset. Select any row to expand it and see the full detail: native ID, account, Discovered At, Last Seen, service, discovery method, and any cloud tags.
5. Export to CSV
On the Inventory tab, select Export CSV. The download reflects your current filters and sort order and includes: Name, Account, Provider, Type, Service, Region, Status, Native ID, Last Seen, and Discovered At. The file is named with the export date (for example, asset-inventory-2026-06-02.csv).
How it feeds Attack Path Analysis
The inventory isn't just a list — it's the map of your environment that Attack Path Analysis uses to find exploitable routes to your most sensitive assets. Discovered resources become the nodes of an attack graph: cloud resources (and whether they're public-facing), identities (IAM users, roles, and service accounts), data stores, and network controls such as security groups and firewall rules. Attack Path Analysis then connects these to highlight toxic combinations (for example, a public resource with a path to an over-privileged identity) and surfaces your most-connected assets — the ones with the largest attack surface. Richer, more current inventory means more accurate attack paths.
Prerequisites & tips
Discovery uses the same read-only credentials you set up when connecting an account — it never modifies your cloud resources.
Inventory is scoped to your active team. You only see assets discovered for the team you're currently in. Switch teams from the account menu (top-right) if you expect to see different resources.
A resource appears in the inventory only after the next discovery run for its account. If you just provisioned something, refresh that account (or wait for the next scheduled scan) before expecting to see it.
Related
- Connecting Cloud Accounts — add AWS, Azure, or GCP so the inventory can be populated.
- Scan Orchestration — how cloud discovery and posture scans run and how to schedule them.
- Cloud Account Management — manage connected accounts and their status.