Remediation Queue
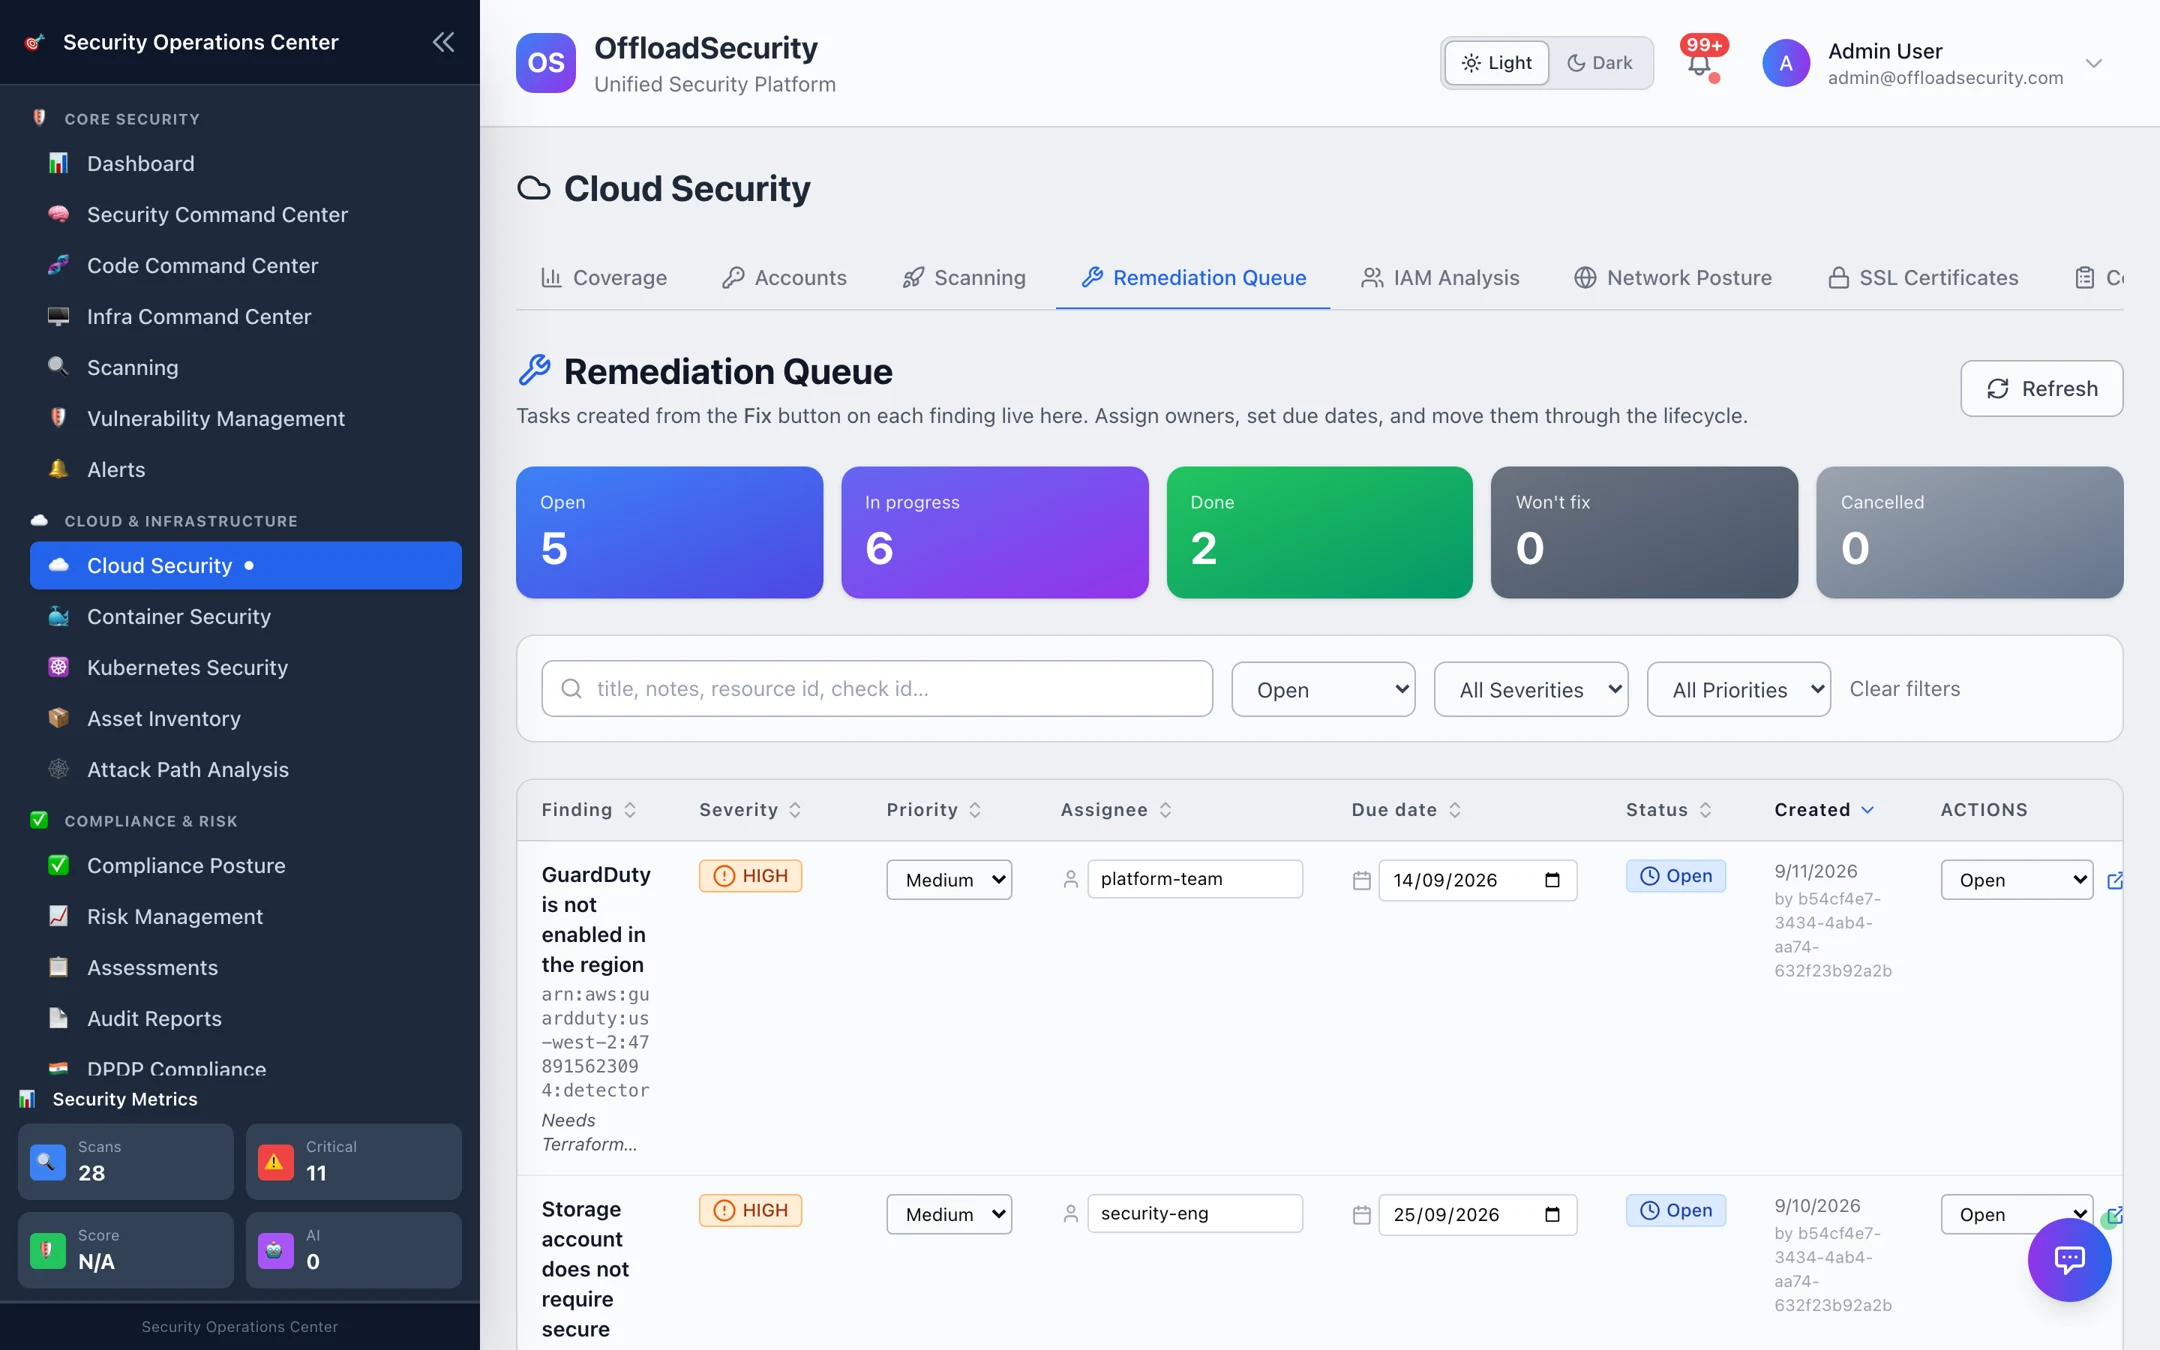
Resolving a finding in the platform does not fix the cloud; someone still has to change a bucket policy or a security group. The Remediation Queue is where that hand-off is tracked. Every task in it was created from a finding with the Fix action, so it stays linked to the check, the resource and the account it came from.
Where: Cloud Security → Remediation Queue.
Creating a task
- On the Scanning tab, expand a finding and select Fix (Create remediation task).
- Enter an assignee (email or name), a priority, a due date and any notes for the owner.
- The task is created as Open and linked to the finding (check, resource, account).
You can create tasks over the API as well — see Cloud Security API.
Working the queue
The tiles count tasks per status; the table lists them non-terminal first (Open, In progress) so the work that still needs attention is always at the top. Filter by status, severity, priority or search by title, notes, resource ID or check ID.
Each row shows the finding title, the affected resource ID, severity (from the finding), and editable priority, assignee, due date and status. Changes save immediately.
| Status | Use it when |
|---|---|
| Open | Created, nobody has started. |
| In progress | The owner is working on it. |
| Done | The change is made. The next scan verifies it — if the check still fails, the finding stays open and you will see it on the Scanning tab. |
| Won't fix | The owner decided not to change it. Pair this with a suppression on the finding so the risk is recorded as accepted, not ignored. |
| Cancelled | Created by mistake or superseded. |
A task says "someone will fix this by a date". A suppression says "we accept this for a period". Use a task for anything you intend to change, and a suppression for accepted risk — the queue stays a true to-do list and the audit trail stays honest.
Related
- Reviewing & Triaging Findings — where tasks are created.
- SLA Management — due dates driven by severity policies for the unified vulnerability view.